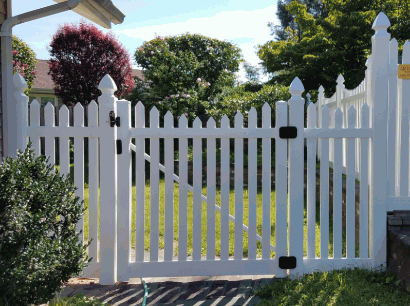
Looking to add a charming touch to your home with a picket fence gate?
This article will guide you through the step-by-step process of installing a picket fence gate.
From gathering the necessary materials to making final adjustments and finishing touches, we’ve got you covered.
Whether you’re a seasoned DIYer or a novice, this article will provide you with the knowledge and confidence to tackle this project with ease.
Let’s get started!
Materials Needed For Installation
When preparing for the installation of a gate, it is essential to gather the necessary materials to ensure a smooth process. Some of the key materials required include gates, gate hinges, gate latch, screws, and timber.
Gate hinges are crucial components as they provide the pivot point for the gate to open and close smoothly. It is essential to select hinges that can bear the weight of the gate while ensuring durability.
The gate latch acts as the lock mechanism, keeping the gate securely closed when needed. Choosing a sturdy and reliable latch is essential for security purposes.
Screws are used to secure various parts of the gate together and attach it to the supporting posts. It is advisable to use rust-resistant screws to prevent corrosion and ensure longevity.
Timber serves as the material for the gate itself, providing strength, stability, and aesthetics to the overall structure. When selecting timber, consider its durability, resistance to weather, and compatibility with the gate design.
Gain insights: What Wood Fence Is The Best
Pickets
Pickets play a crucial role in the construction of a gate, adding both aesthetic appeal and functionality to the overall design. These vertical slats are typically made of timber and are essential components in creating a secure and visually pleasing gate.
When considering pickets for your gate, it is important to explore the different timber options available, such as cedar, pine, or redwood, each offering distinct characteristics in terms of durability and appearance. The size of the pickets also plays a significant role, with common widths ranging from 1.5 inches to 3.5 inches, providing varying levels of privacy and style.
The finish of the pickets can greatly impact the gate’s final look, whether you opt for a natural wood finish, stain, or paint. Selecting pickets that complement the design and dimensions of your gate is crucial to achieving a cohesive and visually appealing entrance to your property.

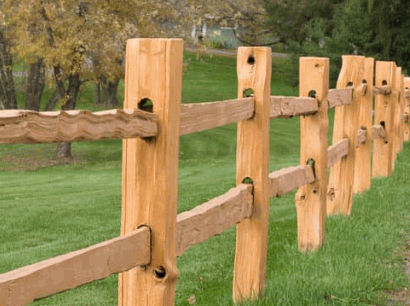
Rails
Rails are integral parts of gate construction, serving as horizontal supports that connect the gate posts and provide structural stability. Typically crafted from timber, rails contribute to the overall durability and strength of the gate.
Proper sizing and spacing of rails are crucial to ensure the gate functions smoothly and securely. Incorrect dimensions can lead to sagging or misalignment, compromising the gate’s effectiveness. Securely attaching the rails to the gate posts is paramount to maintaining the gate’s structural integrity.
By using appropriate hardware such as bolts, screws, or brackets, the rails can be firmly secured to the posts, preventing movement or loosening over time. Reinforcing the connection points with braces adds an extra layer of stability, especially for gates subjected to heavy usage or external forces.
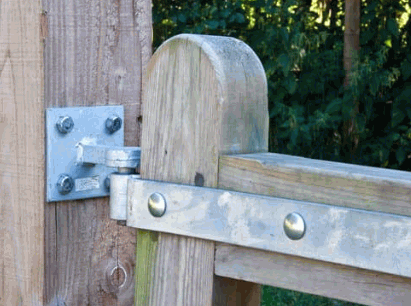
Gate Hinges
Gate hinges are essential components that facilitate the opening and closing of the gate. These fittings allow smooth movement while ensuring the gate remains securely attached to the gate posts, providing both functionality and stability to the gate.
When selecting gate hinges, it’s vital to consider the type of gate you have, as different hinge styles suit various gates. Common types include butt hinges, strap hinges, barrel hinges, and self-closing hinges.
The choice of hinges should align with the gate’s weight and dimensions to guarantee proper support and smooth operation.
Installing gate hinges securely involves marking the hinge placement, pre-drilling holes, affixing the hinges using appropriate screws, and adjusting to ensure proper alignment for optimal performance.
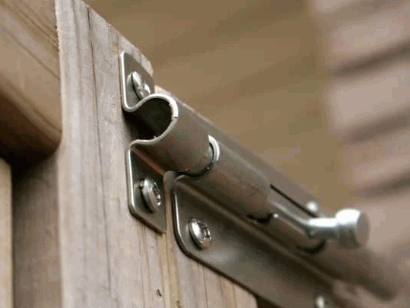
Gate Latch
A gate latch is a crucial component for securing the gate in a closed position, providing privacy and security to the enclosed area. Proper installation of the gate latch ensures smooth operation and effective locking of the gate.
There are various types of gate latches available, such as gravity latches, spring-loaded latches, and key-operated latches, each offering different levels of security and convenience.
The positioning of the latch is also of utmost importance, as an improperly placed latch can compromise the security of the gate. To maintain your gate latch, regularly inspect it for any signs of wear and tear, clean it from any debris or rust, and lubricate it to ensure smooth functioning.
Adjusting the gate latch may be necessary over time to compensate for any changes in the gate’s alignment or to tighten the latch for enhanced security.
Screws
Screws play a vital role in securing various components of the gate together, including hinges, latch, and pickets. Choosing the right corrosion-resistant screws that are suitable for outdoor use and compatible with the gate materials is essential for a durable and stable gate construction.
In terms of gate construction, the size and type of screws used can significantly impact the overall strength and longevity of the structure. Common screw sizes for gate assembly range from #6 to #14, with lengths varying based on the thickness of the materials being joined. Different types of screws such as wood screws, self-tapping screws, or lag screws are chosen depending on the specific requirements of the gate design.

Nails
Nails are essential fasteners in gate construction, primarily used for attaching pickets to rails and securing timber components together. Choosing the right nails that are suitable for outdoor applications and provide strong connections is crucial for the longevity of the gate.
There are various types of nails commonly used in gate construction, including common nails, ring shank nails, and screw nails.
- Common nails are versatile and cost-effective, suitable for general-purpose applications.
- On the other hand, ring shank nails offer enhanced holding power due to their textured surface, making them ideal for heavy-duty gates.
- Screw nails provide excellent grip and are less likely to pull out over time.

Drill
A drill is a versatile tool that aids in creating holes for screws, bolts, and other fasteners during gate installation. Having a reliable and appropriately sized drill is essential for precise hole placement and efficient assembly of the gate components.
Using the right drill size for different gate fittings is crucial as it ensures that the holes are neither too loose nor too tight, providing a secure attachment.
When drilling into timber surfaces, it is advisable to mark the drilling points accurately using a pencil to avoid any mistakes. Additionally, safety goggles should always be worn to protect your eyes from wood chips and debris.
For masonry surfaces, start drilling at a slow speed to prevent cracking or chipping. Switch to a higher speed once the hole is initiated for smoother drilling.
- Regularly cleaning the drill and removing any debris from the chuck will help maintain its performance and extend its lifespan.
- Applying a few drops of lubricating oil to the chuck and gears every few months can prevent rust and ensure smooth operation.

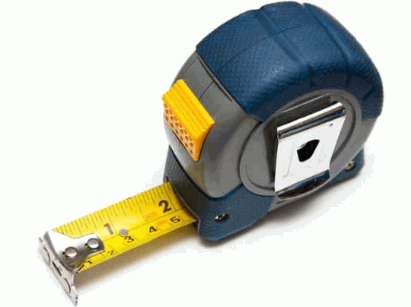
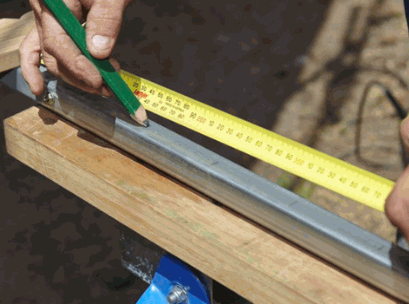
Measuring Tape
A measuring tape is a critical tool for accurately determining gate dimensions, post-hole depths, and picket lengths during the installation process. Precision measurements with a reliable measuring tape ensure proper alignment and structural integrity of the gate.
When installing a gate, the accuracy of measurements plays a crucial role in achieving a secure and aesthetically pleasing finish. Proper measurements ensure that the gate fits perfectly within the designated area and functions as intended.
Double-checking measurements is a simple yet effective way to avoid costly errors and rework. It is advisable to measure multiple times to confirm the accuracy before cutting materials or digging post holes.
Using the measuring tape correctly is essential. Ensure it is taut when measuring distances to prevent inaccuracies that could affect the gate’s overall alignment.
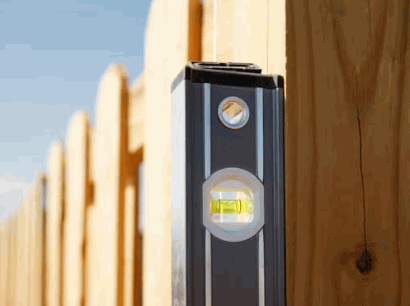
Level
A level is a crucial tool for ensuring that the gate components are installed straight, level, and plumb. Proper alignment achieved with a level not only enhances the gate’s aesthetic appeal but also promotes structural stability and functional operation.
- When installing a gate, using a level helps prevent potential issues like sagging, misalignment, or difficulties in opening and closing. To ensure proper installation, begin by placing the level horizontally on the top rail of the gate to check for levelness. Adjust the gate’s position as needed until the bubble is centered.
- It’s essential to verify vertical alignment by placing the level vertically against the gate post or stile. Ensuring both horizontal and vertical alignments are precise will create a solid foundation.
Hammer
A hammer is an essential tool for driving nails, securing fittings, and making adjustments during gate construction. Choosing the right hammer with the appropriate weight and grip ensures precise installation and efficient assembly of gate components.
There are several types of hammers suitable for gate construction, each designed for specific tasks. For example, a claw hammer is versatile and commonly used for driving and removing nails, while a framing hammer with a straight claw is ideal for heavy-duty work.
When hammering to secure nails and fittings in gate installation, it is important to hold the hammer with a firm grip and apply controlled force to avoid damaging the materials. Proper hammer maintenance by regularly checking for wear, cleaning the head, and storing it in a dry place can extend its lifespan for prolonged use in gate projects.

Preparing For Installation
Before commencing the installation of a gate, thorough preparation is key to ensuring a successful and durable outcome. This involves steps such as marking the gate location, digging post holes, and preparing the necessary components for assembly.
- Measuring and marking the gate location accurately is crucial to ensure proper alignment and symmetry. Use a tape measure and level to determine the exact placement of the gate.
- Next, digging post holes to the appropriate depth is essential for the stability and longevity of the gate. The depth should typically be at least one-third of the length of the post. Ensure that the holes are aligned correctly to avoid any future issues with the gate’s operation.
When selecting materials for the gate, consider the dimensions and design to choose the most suitable options. For smaller gates, lightweight materials like aluminium may be sufficient, while larger or more decorative gates may require sturdier materials such as steel or wrought iron. Opt for materials that are weather-resistant to withstand outdoor elements and ensure longevity. By carefully considering these factors during the preparation phase, you can set the foundation for a well-installed and functional gate.
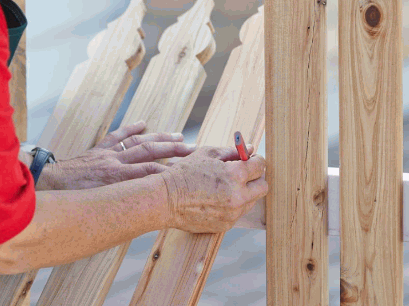
Measure And Mark The Location Of The Gate
The initial step in gate preparation involves measuring and marking the location where the gate will be installed. Accurate measurements and precise marking ensure proper alignment and positioning of the gate structure within the fence line.
Using a measuring tape is crucial to accurately determine the distance and height of the gate. Start by measuring from the starting point marked on the fence to the desired gate location. Using a marker, make clear and visible marks on the ground or fence posts where the gate’s sides and hinges will be positioned.
When marking the gate position, consider factors such as the swing direction, clearance needed for opening and closing, and any obstacles that may interfere with the gate’s movement. It’s vital to ensure that the gate has enough space to operate smoothly without obstruction.
After marking the gate position, it is essential to double-check all measurements to avoid errors during installation. Even a slight miscalculation can lead to misalignment or improper function of the gate. Taking the time to verify measurements will result in a seamless and error-free gate installation.
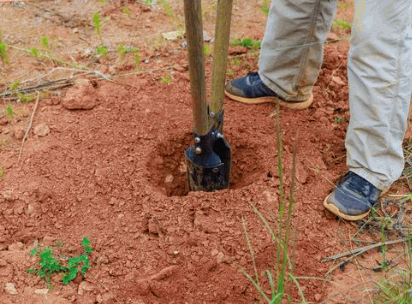
Dig Post Holes
Digging post holes is a critical step in gate installation, as it determines the stability and longevity of the gate structure. Properly spaced and adequately deep post holes ensure secure anchoring of the gate posts for a robust and durable installation.
In terms of post-hole depth and spacing, these factors are crucial in ensuring the gate has the required support. The depth of the hole should typically be around two to three times the width of the gate post, providing a solid foundation.
Gate dimensions play a significant role in determining the exact distance between the post holes, as wider gates necessitate more space between posts for structural integrity.
Having the right tools for digging is essential for efficiency. Consider using a post-hole digger, shovel, and level for precision. It’s also advisable to mark the spot for each hole accurately before digging to maintain consistency in post-placement.
Proper alignment is key to uniform post placement, ensuring that the gate functions correctly and looks aesthetically pleasing.
Install Gate Posts
Installing gate posts is a foundational step that sets the framework for the gate structure. Placing the posts securely in the post holes and ensuring proper alignment is essential for the stability and longevity of the gate installation.
Plus securing the posts, and post bracing plays a crucial role in preventing sagging or shifting, especially for heavy gates.
Proper post bracing distributes the weight evenly, reducing stress on individual posts and enhancing the overall strength of the gate setup.
Before installing the posts, carefully assess the gate dimensions and desired height to select posts that can support the weight and height requirements efficiently. Consider factors such as wood type, steel reinforcement, or other materials based on the gate design and expected usage.
Attach Rails To Posts
Attaching rails to gate posts is a crucial step in building the gate structure, as it provides support and stability to the gate framework. Securely fastening the rails to the posts ensures structural integrity and uniform spacing for attaching pickets.
When attaching the rails, start with marking the placement on the posts at an appropriate height and spacing based on the gate design and width. Use a level to ensure that the rails are installed parallel to the ground for a professional finish. Depending on the gate’s intended function and aesthetic appeal, choosing the right rail size is essential. Opt for heavy-duty rails for larger gates to withstand potential stress and ensure durability. Always double-check the alignment and measurements before securing the rails to the posts for a seamless gate construction process.
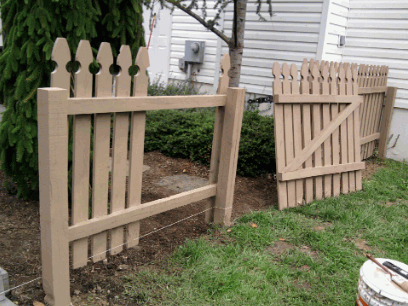
Installing The Pickets
Installing pickets is a crucial phase in gate construction, adding both aesthetic appeal and functionality to the gate design. Properly measuring, cutting, and attaching pickets contribute to the overall security and visual appeal of the gate.
In terms of ensuring the precise picket installation, accuracy is key. Start by measuring each picket carefully to guarantee uniformity in height and spacing. Use a reliable measuring tape or ruler to maintain consistency. Once measurements are complete, the next step involves cutting the pickets to the desired length. Remember to double-check measurements before making any cuts to avoid errors. Attaching pickets securely to the rails is essential for a durable gate. Consider using high-quality screws or nails to firmly fasten the pickets in place for longevity and stability.
Measure And Cut Pickets
Before attaching pales to the gate structure, it is crucial to measure and cut them to the required length. Accurate measurements and precise cutting ensure uniform pale alignment and a visually appealing gate design.
For measuring the pales, use a reliable tape measure to determine the length needed for each pale. Ensure consistency by marking the measurements clearly on each pale before cutting. When cutting the pales, a miter saw or circular saw equipped with a fine-toothed blade is ideal for achieving clean and precise cuts.
To maintain consistency in pale dimensions, it is advisable to create a jig or template that can be used as a guide for cutting multiple pales. This ensures that all pales are uniform in size and spacing, resulting in a professional-looking gate appearance.
Attach Pickets To Rails
Attaching pickets to rails is a critical step in gate construction, as it forms the primary barrier for the gate. Properly spacing and securing pickets to the rails ensure structural integrity, security, and a visually appealing gate design.
- When attaching pickets to rails, evenly spaced picket spacing and alignment are key factors that contribute to the overall strength and aesthetics of the gate. By maintaining consistent spacing between pickets, you not only enhance the gate’s appearance but also prevent any potential gaps that could compromise its security. Ensuring alignment is equally important as it creates a professional finish and provides a seamless look.
To securely fasten pickets to rails, it is recommended to use high-quality screws or nails that are suitable for outdoor use. Stainless steel screws or galvanized nails are great choices as they offer durability and resistance to rust, ensuring a long-lasting gate structure.
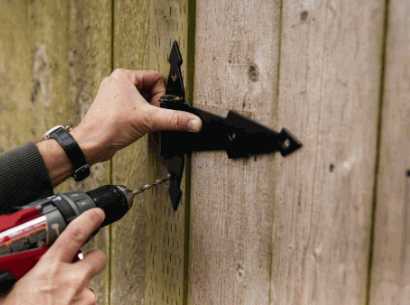
Attaching Gate Hardware
Attaching gate hardware, such as hinges and latches, is a crucial step in the gate installation process that ensures smooth operation and security. Proper installation of gate hardware components enhances the functionality and longevity of the gate.
When installing gate hinges, it is important to ensure they are correctly aligned to support the weight and movement of the gate.
Placing the latch at the right height is also vital for easy access and security; it should align with the corresponding catch perfectly.
After securing the hardware, adjustments might be necessary to guarantee a snug fit and smooth operation. This could involve tweaking the tension, alignment, or positioning of the hinges and latch.
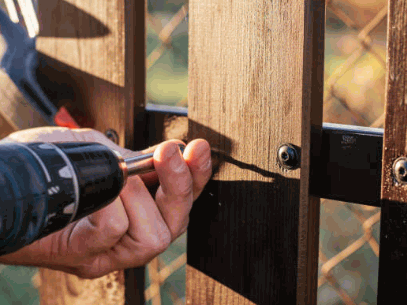
Install Gate Hinges
Installing gate hinges is a critical aspect of gate construction, as they enable the gate to swing open and close smoothly. Proper positioning and secure attachment of gate hinges to the gate posts ensure stable operation and longevity of the gate structure.
There are various types of gate hinges available, each designed to suit different gate styles and functions. Common types include strap hinges, butt hinges, T-hinges, and self-closing hinges. Choosing the right hinge depends on factors such as the gate’s weight, size, and style.
When installing gate hinges, start by marking the correct placement on the gate and post. Use a level to ensure the gate hangs evenly. Securely attach the hinges with appropriate fasteners, making sure they are aligned and level for smooth operation.
- For heavyweight gates, opt for heavy-duty hinges with ball bearings for added strength.
- Consider decorative hinges for enhancing the aesthetic appeal of your gate.
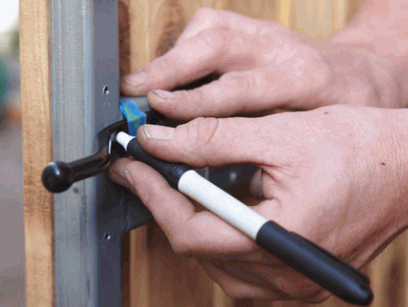
Install Gate Latch
Installing a gate latch is essential for securing the gate in a closed position and ensuring privacy and security.
Proper alignment and operation of the gate latch are crucial for hassle-free use and reliable security of the enclosed area.
There are various types of gate latches commonly used, including lever latches, thumb latches, and slide bolts, each offering unique features and styles to match different gate designs and security needs.
In terms of latch installation, it is important to carefully assess the gate and its material to choose the appropriate latch type and ensure it is securely fixed in place.
For optimal functionality, proper alignment of the latch is key to ensure smooth opening and closing without any jams or gaps compromising the security measures.
Regular maintenance of the latch, such as lubrication and periodic checks for any misalignments or damages, can significantly extend its lifespan and reliability, thus enhancing the overall security of the gate.
Final Adjustments And Finishing Touches
After completing the main installation steps, final adjustments and finishing touches are essential to ensure the gate operates smoothly and enhances the overall aesthetics of the property.
Checking alignment and adding decorative elements contribute to a well-executed gate project.
- One crucial aspect to consider is gate alignment. Even the smallest misalignment can cause operational issues and compromise security. To rectify this, use a level to ensure the gate is straight both vertically and horizontally.
- For optimal fit, focus on adjusting the gate’s hinges and latches. Proper alignment of these components is vital for seamless opening and closing.
- Consider incorporating intricate designs or embellishments on the gate. This can add a touch of elegance and personalise the structure to match the property’s style.
- Adding finishes like powder coating or paint not only enhances the gate’s appearance but also protects it from weather damage, increasing its longevity.
Check Alignment And Adjust If Necessary
Ensuring proper alignment of the gate structure is crucial for smooth operation and long-term durability. Checking alignment post-installation and making necessary adjustments guarantee that the gate functions correctly and fits seamlessly within the property.
One common method to check gate alignment is to use a level horizontally and vertically on the gate structure. Start by placing the level on the top edge of the gate to ensure it is not sloping. Then, check the vertical alignment to see if the gate is hanging straight.
Common alignment issues include sagging gates, misaligned hinges, and latches that don’t properly engage. These issues can lead to difficulty in opening and closing the gate smoothly.
To address alignment problems, consider adjusting the hinges to ensure they are properly aligned and firmly attached. Lubricating hinges can also help in reducing friction and improving gate movement.
Add Finishing Touches
Adding finishing touches to the gate not only enhances its visual appeal but also adds a personal touch to the property. Applying protective coatings, decorative elements, or gate accessories can elevate the overall aesthetics of the gate structure.
When considering finishes for gates, painting, staining, or sealing are common options. The choice of finish should be based on the material of the gate. For example, metal gates may benefit from a durable paint job to prevent rust, while wooden gates could be enhanced with a rich stain to bring out the natural beauty of the wood.
To ensure a cohesive look with the property’s architectural style, selecting finishes that complement the existing design elements is crucial. Opting for finishes that harmonise with the overall colour scheme and aesthetic of the property can create a cohesive and inviting entryway.
- Sometimes, adding embellishments like decorative ironwork, intricate carvings, or personalised signage can further enhance the gate’s appeal. These embellishments can reflect the property owner’s personality and style, making the gate a unique and welcoming feature of the home.