Looking to give your fence a fresh coat of paint?
Before starting, it’s important to clean your fence properly to ensure a smooth and long-lasting finish.
We discuss why cleaning your fence before painting is essential, the tools and materials needed, a step-by-step guide on how to clean your fence effectively, tips to make the process easier, and how often to clean your fence.
Let’s get started!
Explore in-depth: How To Install A Picket Fence Gate
Why Should You Clean Your Fence Before Painting?
Cleaning your fence before painting is crucial to ensure a smooth and lasting finish. Dirt, grime, and debris can hinder the paint’s adhesion, leading to a less durable and professional-looking result.
When dirt and grime accumulate on the surface, the paint may not adhere properly, causing it to peel or chip prematurely. By thoroughly cleaning the fence, you create a pristine canvas for the paint to bond with, resulting in a seamless and long-lasting coat.
Removing debris like cobwebs or bird droppings not only enhances the visual appeal of the fence but also prevents these elements from interfering with the paint application.
For a successful painting project, investing time in prepping the surface through proper cleaning is a simple yet essential step that should not be overlooked.
What Tools And Materials Do You Need?
To clean your fence effectively, you will need a variety of tools and materials, including a power washer, scrub brush, cleaning solution, garden hose, and protective gear to ensure your safety during the cleaning process.
Starting with a power washer, this high-pressure water sprayer is incredibly efficient in removing dirt, grime, and old paint from your fence quickly. A scrub brush complements the power washer by helping to remove stubborn stains and debris in harder-to-reach areas. The cleaning solution acts as a powerful agent to break down tough residue and mould, leaving your fence spotless.
Connecting the garden hose to your power washer ensures a steady water supply for your cleaning endeavor. Don’t forget to wear protective gear like gloves, goggles, and old clothes to shield yourself from any splashes or chemicals during the cleaning process.
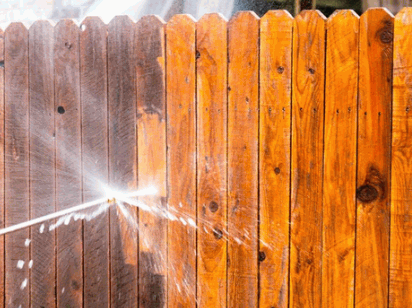
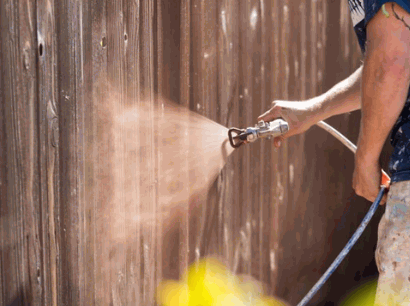
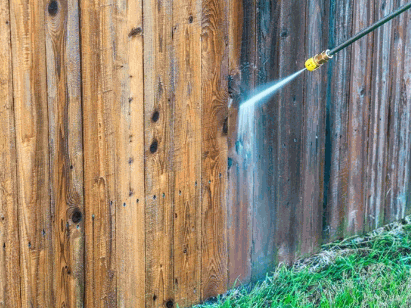
Power Washer
A power washer is a versatile tool that helps in effectively removing dirt, mildew, and old paint from your fence. It provides high-pressure water to clean the surface efficiently, preparing it for a fresh coat of paint.
Using a power washer not only saves time and effort but also ensures a thorough cleaning process to reveal the true beauty of your fence. By blasting away grime and debris that accumulate over time, the power washer restores the natural appearance of the fence.
Additionally, it helps in removing mould, algae, and other contaminants that can damage the wood, prolonging the life of your fence.
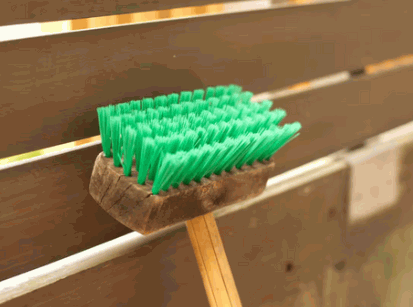
Scrub Brush
A scrubbing brush is essential for dealing with stubborn stains, mould, or mildew on your fence. It allows you to apply more pressure to specific areas that need extra cleaning attention, ensuring a thorough prepping process.
When using a scrubbing brush, make sure to choose one with robust bristles that can effectively dislodge dirt and grime without causing damage to the surface of your fence.
The bristles should be firm enough to scrub away tough stains, but not too harsh to scratch or chip the fencing material.
To enhance the cleaning power, pair the scrubbing brush with a suitable cleaning solution, such as a mixture of water and mild detergent, or a specialised fence cleaner. Work in small sections, applying the cleaner and then using the brush in a circular motion to lift off the stains.
Cleaning Solution
A suitable cleaning solution is essential for breaking down dirt, grease, and other contaminants on your fence. It helps in loosening the grime, making it easier to remove during the cleaning process.
Choosing the right cleaning solution can significantly impact the outcome of your fence cleaning project. Opt for products specifically designed for the material of your fence to ensure effective cleaning without causing damage. Look for solutions with ingredients that target tough stains and residues, such as mould, mildew, or bird droppings.
Quality cleaning solutions not only dissolve stubborn residues but also help in prepping the fence surface for further maintenance tasks like painting. They ensure a clean and smooth surface, allowing the paint to adhere properly and prolonging the durability of the finish.

Garden Hose
A garden hose is essential for rinsing off the cleaning solution and debris from your fence after scrubbing. It provides a convenient way to wash away the loosened dirt and prepare the surface for painting.
When using a garden hose for cleaning your fence, make sure to adjust the nozzle to a strong spray setting to effectively remove all residues. Begin rinsing from the top of the fence, working your way down in a systematic manner to ensure thorough coverage. Pay special attention to crevices and corners where dirt may accumulate. Inspect the fence as you rinse to ensure all debris is washed away, and avoid leaving any cleaning solution residue behind. Consider using a long-handled brush attachment to reach higher or hard-to-access areas for a more comprehensive clean.
Protective Gear
Protective gear such as gloves, goggles, and appropriate clothing is crucial to safeguard yourself during the fence cleaning process. It shields you from harsh chemicals, debris, and water, ensuring a safe and comfortable experience.
When selecting gloves for fence cleaning, opt for durable, chemical-resistant ones to protect your hands from direct contact with cleaning agents.
Goggles are essential to shield your eyes from splashes of chemicals or debris, ensuring clear vision and preventing potential eye irritation.
Wearing appropriate clothing like long sleeves and trousers can prevent skin exposure to harmful substances and minimise the risk of accidental injuries during the cleaning process.
Step-By-Step Guide For Cleaning Your Fence
- Following a step-by-step guide for cleaning your fence can help you achieve a thorough and effective cleaning process. By carefully executing each step, you can ensure a well-prepped surface for painting.
Start by inspecting your fence for any loose boards, nails, or debris that need addressing before cleaning.
Scrubbing the fence with a mixture of warm water and mild soap can help remove dirt and grime effectively. Ensure you rinse the fence thoroughly to prevent soap residue that can affect the paint’s adhesion.
Use a pressure washer on a low setting to eliminate tougher stains and mildew. Protect nearby plants and surfaces from potential damage by covering them with plastic sheeting. Apply a fence sealant or stain to protect and enhance the appearance of your fence.
Prepare The Area
Before starting the cleaning process, ensure to remove any obstacles near the fence, such as plants, furniture, or decorations. Clearing the area allows for easy access to the fence and prevents any hindrances during cleaning.
Creating a well-organised workspace plays a crucial role in achieving optimal results while cleaning your fence. Start by setting up a designated area for your cleaning supplies and tools, ensuring everything is within arm’s reach. Utilise containers or a small table to keep your items organised and easily accessible.
Additionally, safeguarding your surrounding spaces like gardens or outdoor furniture from potential damage is equally essential. Covering nearby plants with cloth or plastic sheeting can shield them from cleaning solutions or debris, preserving their health and appearance.
Mix The Cleaning Solution
Prepare the cleaning solution by following the manufacturer’s instructions or creating a DIY solution using common household ingredients. Ensure the solution is well-mixed and potent enough to tackle dirt and grime effectively.
When concocting your own cleaning mixture, a simple yet powerful option involves using a combination of vinegar, bicarbonate of soda, and water. Vinegar acts as a natural disinfectant, while bicarbonate of soda aids in scrubbing off stubborn stains. Mix these ingredients in a spray bottle in the right proportions to create a potent cleaning solution. For wooden fences, you may want to add a bit of gentle soap to the mix to gently cleanse without damaging the wood.
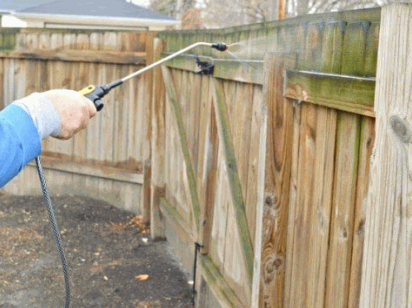
Wet The Fence
Using a garden hose or a power washer, wet the fence thoroughly to loosen surface dirt and debris. Wetting the surface helps in preparing it for the application of the cleaning solution.
Wetting the fence before cleaning is a crucial step that can significantly impact the efficiency and effectiveness of the cleaning process. By moistening the surface, it allows the cleaning solution to penetrate deeper into the grime, making it easier to lift and remove stubborn stains.
Properly wetting the fence also helps in softening residues, such as bird droppings or mold, which can be difficult to remove if left dry. To ensure the surface is adequately wet, make sure to cover all areas evenly without leaving dry spots.
You can test the wetness by observing how the water beads on the surface; ideally, it should spread out evenly. Adjust the water pressure according to the dirt accumulation, ensuring consistent saturation for optimal results.
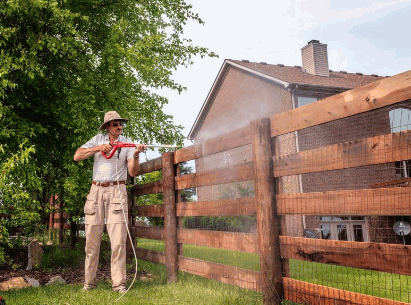
Apply The Cleaning Solution
Apply the cleaning solution evenly across the fence surface using a brush or sprayer. Ensure complete coverage to address all areas with dirt or stains, allowing the solution to penetrate and break down contaminants effectively.
Remember, the key to achieving a spotless finish lies in the even distribution of the cleaning solution. By ensuring that every section of the fence receives a uniform application, you guarantee that stubborn grime and dirt are thoroughly targeted. It’s crucial to pay extra attention to any stubborn spots that may require a stronger concentration of the solution.
Be meticulous in your approach, taking the time to work the solution into these areas to achieve the best results. Don’t rush this step, as thorough coverage is essential for a truly pristine outcome.
Scrub The Fence
Use a scrubbing brush or sponge to work the cleaning solution into the fence surface, focusing on areas with tough stains or grime. Scrubbing helps in agitating the dirt for easier removal during rinsing.
For optimal results, it is recommended to start from the top and work your way down the fence in small sections. Ensure to apply enough pressure while scrubbing, but be cautious not to damage the surface. Utilise a back-and-forth motion to dislodge embedded dirt effectively.
Consider using a mild detergent mixed with water for an eco-friendly approach. If dealing with stubborn stains, you may opt for a specialised fence-cleaning solution. Remember to wear gloves and eye protection for safety.
Rinse The Fence
After scrubbing, rinse the fence thoroughly with a garden hose or power washer to remove the cleaning solution and debris. Ensure all residues are washed away, leaving behind a clean and prepped surface.
When rinsing the fence post-cleaning, it is essential to pay extra attention to all edges and corners to ensure every nook and cranny is free from any remnants of the solution. Use a gentle, steady spray to avoid damaging the surface while still achieving a thorough clean.
It’s recommended to work in sections, moving systematically to cover the entire fence without missing any spots. This methodical approach not only ensures comprehensive rinsing but also helps in maintaining a consistent finish for your painting process.
What Are Some Tips For Cleaning Your Fence?
Cleaning your fence efficiently requires attention to detail and some useful tips to ensure a successful outcome. By following these recommendations, you can streamline the cleaning process and achieve a well-prepped surface for painting.
If you’re dealing with stubborn stains on your fence, using a mixture of warm water and mild soap can be highly effective. Scrubbing gently with a soft-bristled brush can help loosen the grime without damaging the material. Alternatively, for tougher stains, consider using a specialised fence cleaner available at most hardware stores.
To make the job easier, start cleaning from the bottom and work your way up, ensuring that you cover every inch of the surface. Regular maintenance such as occasional spot-cleaning can prevent dirt buildup and make the overall cleaning process less daunting.
Remember to wear protective gear like gloves and safety goggles to safeguard yourself from any splashes or fumes during the cleaning process.
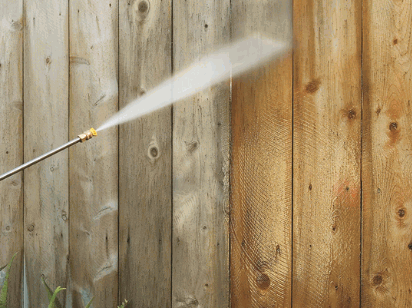
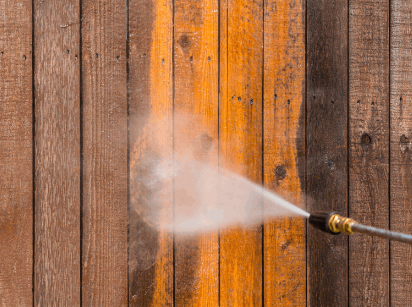
Use A Power Washer With Caution
When using a power washer, exercise caution to prevent damage to the fence or injury. Start with low-pressure settings and gradually increase as needed, maintaining a safe distance to avoid splintering or gouging the wood.
It is essential to thoroughly inspect the fence for any loose boards, cracks, or damage before starting. Ensure all connections are tight, and there are no leaks in the machine that might cause erratic spraying patterns.
Always wear protective gear such as goggles, gloves, and closed-toe shoes to shield yourself from any potential debris or backsplash. Remember to keep the spray nozzle moving continuously to prevent concentrated pressure on a single area, which could lead to unintended damage.
Be cautious of electrical hazards when using power washers near outlets or electrical wires. It’s also advisable to test the pressure on a small inconspicuous area first to gauge its impact before proceeding with the entire fence.
Test The Cleaning Solution On A Small Area First
Before applying the cleaning solution to the entire fence, test it on a small inconspicuous area to ensure compatibility and effectiveness. This step helps in avoiding potential damage or adverse reactions to the wood surface.
By patch-testing the cleaning solution, you can observe how it interacts with the fence material, whether it causes discolouration, warping, or any other unwanted effects. To conduct the test, mix a small amount of the solution as per the manufacturer’s instructions, then apply it using a sponge or cloth on a hidden part of the fence.
After allowing the test area to dry completely, carefully inspect for any changes. If there are no adverse reactions after 24-48 hours, the solution may be safe for the entire surface. If you notice any negative effects, consider trying a different cleaning solution that is gentler or better suited to your fence material.
Wear Protective Gear
Always wear appropriate protective gear such as gloves, goggles, and a mask when cleaning your fence. Protecting yourself from chemicals, debris, and water ensures a safe and comfortable cleaning experience.
Protective gear plays a crucial role in safeguarding your well-being during fence cleaning activities. Gloves shield your hands from sharp edges and chemicals, goggles protect your eyes from splashes and debris, and a mask prevents inhaling harmful fumes or dust particles.
Opt for sturdy gloves made of synthetic materials to resist chemicals, ANSI-approved goggles with side shields for full eye protection, and a respirator mask to filter out harmful substances. These gear choices not only minimise the risk of accidents but also ensure a more efficient and safer cleaning process.
Work In Sections
Divide the fence into manageable sections and clean one area at a time to maintain efficiency and thoroughness. Working in sections allows you to focus on specific areas without feeling overwhelmed during the cleaning process.
Once you’ve divided the fence into sections, start by cleaning the top section first, as this prevents dirt and grime from falling onto areas you’ve already cleaned. Begin by spraying the section with a mild detergent solution and allow it to sit for a few minutes to loosen tough stains. Next, use a scrub brush or sponge to scrub away the dirt, working from top to bottom in a systematic motion. Rinse each section thoroughly with a garden hose to ensure all soap residue is removed, and repeat the process for each section until the fence sparkles.
How Often Should You Clean Your Fence?
The frequency of cleaning your fence depends on various factors such as weather conditions, the presence of vegetation nearby, and the type of fence material. In general, it is recommended to clean your fence at least once a year to maintain its appearance and longevity.
Some situations may require more frequent cleaning. For instance, if your fence is constantly exposed to high humidity or heavy rainfall, it might need cleaning twice a year to prevent mould or mildew growth. If you have trees or plants near the fence, you may need to clean it more often to remove debris and prevent stains.
Regular maintenance is crucial not just for aesthetics but also for preventing structural damage. By cleaning your fence regularly, you can avoid costly repairs and ensure it serves its purpose for years to come.