Explore the world of stunning epoxy floor designs and transform your space into a masterpiece. Whether you’re looking to upgrade your home or give your commercial space a modern touch, this article will guide you through the process with expert tips and tricks. Don’t settle for boring floors, unleash your creativity and amaze yourself.
What Is Epoxy Floor Design?
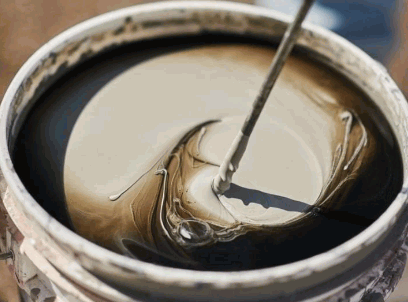
Epoxy floor design involves using epoxy resin to create unique and visually appealing floor surfaces. This type of flooring is made by mixing epoxy resin with a hardener, resulting in a strong and glossy finish. Epoxy floor design provides a wide range of customization options, including different colors, patterns, and textures. It is commonly used in commercial spaces like warehouses, showrooms, and garages, as well as in residential settings. The versatility and visual attractiveness of epoxy floor design make it a popular choice for those wanting to enhance the look of their floors.
What Are The Different Types Of Epoxy Floor Designs?
Epoxy flooring has become more and more popular due to its durability, easy maintenance, and stylish appearance. But did you know that there are different types of epoxy floor designs? In this section, we will discuss the various styles of epoxy floors, such as the captivating metallic epoxy design, the immersive 3D epoxy design, the elegant marble epoxy design, and the playful flake epoxy design. Each design offers unique characteristics and possibilities for transforming your space. Let’s delve into it and explore the beauty and versatility of epoxy floor design.
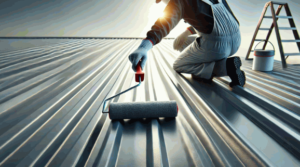
1. Metallic Epoxy Floor Design
Metallic epoxy floor design is a popular choice for creating stunning and unique flooring surfaces. To achieve a metallic epoxy floor design, follow these steps:
- Prepare the floor by cleaning and degreasing it thoroughly.
- Repair any cracks or imperfections on the floor surface.
- Sand the floor to create a smooth and even surface.
- Apply a primer coat to ensure proper adhesion of the epoxy.
- Mix the epoxy resin and hardener according to the manufacturer’s instructions.
- Add metallic pigments or dyes to create the desired metallic effect.
- Apply a base coat of the epoxy mixture, spreading it evenly across the floor.
- Create the metallic design using techniques like marbling, swirling, or using a metallic roller.
- Apply a top coat of clear epoxy to seal and protect the design.
- Maintain the metallic epoxy floor by regular cleaning, avoiding harsh chemicals, and using protective mats in high-traffic areas.
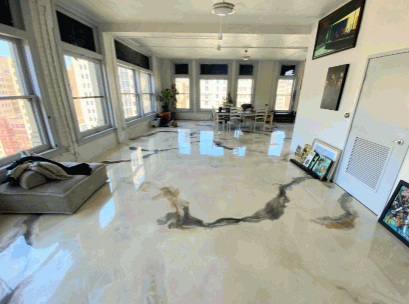
2. 3D Epoxy Floor Design
3D epoxy floor design is a unique and visually stunning option for flooring. It creates the illusion of depth and dimension, making it a popular choice for commercial spaces, homes, and even art installations. This type of epoxy flooring involves using special techniques and materials to create a dimensional effect. The design possibilities are endless, with options ranging from realistic images to abstract patterns.
With its durability and aesthetic appeal, 3D epoxy floor design is a great way to transform any space into a work of art.

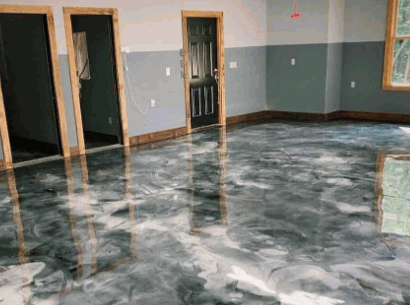
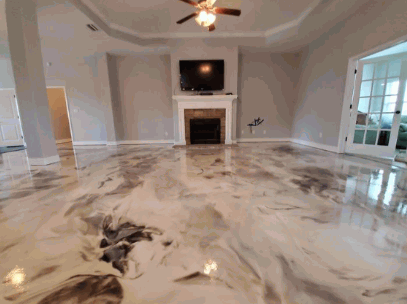
3. Marble Epoxy Floor Design
Creating a marble epoxy floor design involves several steps to achieve a beautiful and realistic marble effect. Here is a list of steps to follow:
- Prepare the floor by cleaning and degreasing it thoroughly.
- Repair any cracks or imperfections on the floor.
- Sand the floor to create a smooth surface.
- Apply a primer to ensure good adhesion of the epoxy.
- Mix the epoxy resin and hardener according to the manufacturer’s instructions.
- Add pigment or dye to create the desired marble color.
- Apply a base coat of epoxy to the floor.
- Create the marble design using techniques like marbling or veining.
- Apply a top coat to seal and protect the design.
Following these steps will help you achieve a stunning marble epoxy floor design that adds elegance and beauty to any space.
4. Flake Epoxy Floor Design
Flake epoxy floor design is a popular choice for adding texture and visual interest to floors. It involves applying a base coat of epoxy resin and then sprinkling decorative flakes onto the surface while it is still wet. These flakes come in a variety of colors and sizes, allowing for endless design possibilities. After the flakes are applied, a clear top coat is added to seal and protect the floor.
Flake epoxy floors are not only visually appealing but also durable and easy to maintain, making them an ideal option for residential and commercial spaces.

What Are The Materials Needed For Epoxy Floor Design?
The epoxy floor design is a popular and durable flooring option that adds a unique touch to any space. However, before diving into the creative process, it’s essential to understand the materials needed for this project. In this section, we’ll discuss the key components of epoxy floor design, including epoxy resin, hardener, pigment or dye, base coat, top coat, and the necessary tools for application. By the end, you’ll have a better understanding of the materials required to create a beautiful and long-lasting epoxy floor.
1. Epoxy Resin
Epoxy resin is a key component in creating durable and attractive epoxy floor designs. Here are the steps involved in using epoxy resin for flooring:
- Prepare the surface by cleaning and degreasing it.
- Repair any cracks or imperfections on the floor.
- Sand the floor to create a smooth surface.
- Apply a primer to ensure good adhesion of the epoxy resin.
- Mix the epoxy resin and hardener according to the manufacturer’s instructions.
- Add pigment or dye to achieve the desired color.
- Apply a base coat of epoxy resin to the floor.
- Apply the desired design using techniques like metallic, 3D, marble, or flake designs.
- Finish by applying a top coat of epoxy resin for added protection and shine.
By following these steps, you can create a stunning epoxy floor design using epoxy resin.
2. Hardener
The hardener is a crucial component in the epoxy floor design process. Here are the steps involved in using the hardener:
- Measure: Follow the manufacturer’s instructions to accurately measure the appropriate ratio of hardener to epoxy resin.
- Mix: Thoroughly mix the hardener and epoxy resin together, ensuring they are well combined. Use a mixing tool or mixer for best results.
- Time: Pay attention to the pot life of the epoxy mixture, which is the time available for application before it begins to cure.
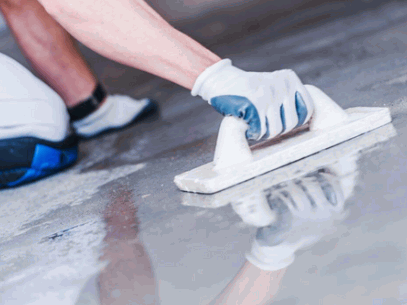
- Apply: Once mixed, apply the epoxy mixture to the prepared floor surface using a roller, brush, or squeegee.
- Spread: Use a trowel or roller to evenly spread the epoxy mixture over the floor, ensuring a smooth and level surface.
- Cure: Allow the epoxy floor to cure for the recommended duration, following the curing instructions provided by the manufacturer.
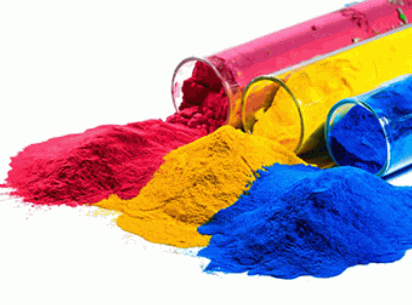
3. Pigment Or Dye
When it comes to the epoxy floor design, the use of pigments or dyes is essential in achieving the desired color and appearance. Here are the steps involved in incorporating pigments or dyes into the epoxy floor design:
- Prepare the epoxy resin and hardener mixture according to the manufacturer’s instructions.
- Add the desired pigment or dye to the mixture. Ensure thorough and consistent mixing to distribute the color evenly.
- Apply the base coat of the epoxy mixture onto the prepared floor surface.
- Using a roller or brush, apply the colored epoxy mixture onto the base coat in the desired design or pattern.
- Once the design is complete, apply a top coat of clear epoxy to seal and protect the colored design.
By following these steps, you can create stunning epoxy floor designs with vibrant and customized colors using pigments or dyes.
4. Base Coat
The base coat is an essential step in the epoxy floor design process. Here are the steps to apply the base coat:
- Clean and prepare the floor surface by removing any debris or contaminants.
- Repair any cracks or imperfections in the floor using a suitable epoxy filler.
- Sand the floor surface to create a rough texture for better adhesion of the base coat.
- Apply a primer to enhance the bonding between the base coat and the floor.
- Using a roller or brush, evenly apply the base coat onto the prepared floor surface.
The base coat acts as a foundation for the epoxy system, providing a solid base for the subsequent layers of epoxy and creating a smooth and durable finish.
5. Top Coat
- Prepare the epoxy mixture: Mix the epoxy resin and hardener according to the manufacturer’s instructions.
- Apply the top coat: Using a roller or brush, apply the top coat evenly over the base coat.
- Ensure coverage: Make sure the entire floor is covered with a thin layer of the top coat.
- Allow drying and curing: Let the top coat dry and cure for the recommended time period specified by the manufacturer.
- Inspect and touch up: Inspect the floor for any uneven areas or imperfections, and touch up as necessary.
- Final curing: Allow the floor to fully cure, following the manufacturer’s instructions, before using the epoxy floor.
6. Tools
When embarking on a project to design an epoxy floor, it is crucial to have the right tools to ensure a successful outcome. Here is a list of tools that are necessary for the job:
- Rollers: These are used to evenly apply the epoxy resin on the floor.
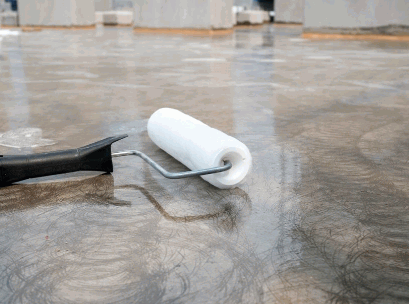
- Squeegees: These are used to spread and level the epoxy resin mixture.
- Mixing paddle: This is used to thoroughly mix the epoxy resin and hardener.
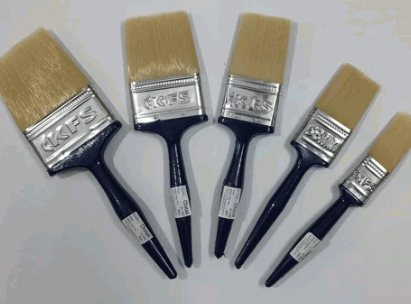
- Paint brushes: These are used for detailed work and to apply the epoxy in hard-to-reach areas.
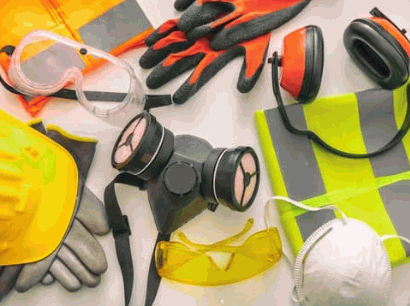
- Protective gear: This includes gloves, goggles, and masks to ensure safety during the application process.
- Measuring tools: These can be measuring cups or scales, used to accurately measure the epoxy resin and hardener ratios.
By having these tools readily available, you will be able to achieve a smooth and professional epoxy floor design.
How To Prepare The Floor For Epoxy Floor Design?
Before immersing yourself in the fascinating world of epoxy floor design, it is essential to adequately prepare the floor to achieve optimal results. In this section, we will discuss the necessary steps to ensure that your floor is ready for the epoxy application process. These steps include cleaning and degreasing the floor, as well as repairing any imperfections to create a smooth and durable surface for your epoxy design. We will also cover the importance of sanding and, if necessary, applying primer for a flawless finish.
Explore further: How To Epoxy Floor Basement
1. Clean And Degrease The Floor
Before applying an epoxy floor design, it is crucial to thoroughly clean and degrease the floor surface. Follow these steps for effective preparation:
- Remove any loose debris, dust, or dirt by sweeping or vacuuming the floor.
- Use a degreaser or detergent to clean any oil, grease, or stubborn stains. Scrub the surface with a stiff bristle brush to remove the grime.
- Rinse the floor thoroughly with clean water to remove any residue from the cleaning solution.
- Dry the floor completely, ensuring no moisture remains before proceeding with the epoxy application.
By diligently cleaning and degreasing the floor, you create a clean and smooth surface that allows the epoxy to adhere properly, resulting in a durable and long-lasting floor design.
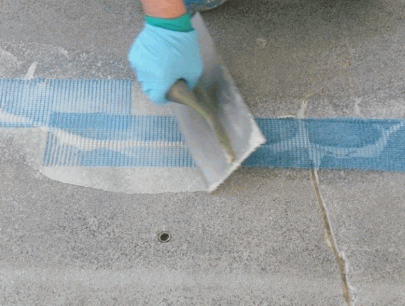
2. Repair Any Cracks Or Imperfections
To repair any cracks or imperfections in an epoxy floor design, follow these steps:
- Clean the damaged area by removing any debris or loose materials.
- Use a crack filler or patching compound to fill in the cracks or imperfections, following the manufacturer’s instructions.
- Smooth out the filled areas using a putty knife or trowel, ensuring a level surface.
- Allow the filler or compound to dry completely before proceeding.
- Sand the repaired areas lightly to create a smooth surface that blends with the rest of the floor.
- Remove any dust or debris from sanding with a vacuum or damp cloth.
- Apply a primer to the repaired areas, following the manufacturer’s guidelines.
- Once the primer has dried, continue with the application of the base coat and design as per the instructions.
3. Sand The Floor
To prepare the floor for epoxy floor design, follow these steps:
- Clean and degrease the floor thoroughly to remove any dirt or residue.
- Repair any cracks or imperfections in the surface of the floor using an appropriate filler.
- Sand the floor to create a rough surface that allows the epoxy to adhere properly. Use a floor sander or sandpaper for smaller areas.
- Apply a primer to the sanded floor to ensure better adhesion of the epoxy.
By following these steps, you will create a smooth and well-prepared surface for applying the epoxy floor design.

4. Apply Primer
To prepare the floor for epoxy floor design, follow these steps:
- Clean and degrease the floor thoroughly to ensure proper adhesion of the epoxy.
- Inspect the floor for any cracks or imperfections and repair them accordingly.
- Sand the floor to create a rough surface, allowing the epoxy to bond better.
- If necessary, apply a primer to enhance the adhesion of the epoxy to the floor.
How To Apply Epoxy Floor Design?
Creating a unique and durable epoxy floor design is a popular option for many homeowners and businesses. However, the process of applying epoxy can be intimidating for those who are unfamiliar with it. In this section, we will break down the steps of how to apply an epoxy floor design, from mixing the resin and hardener to applying the final top coat. By following these steps, you can achieve a stunning and long-lasting epoxy floor design in your space.
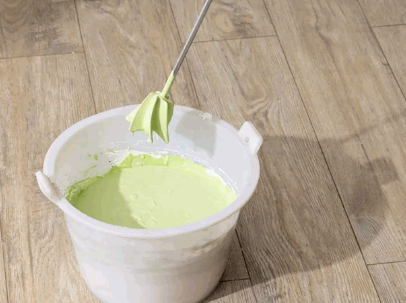
1. Mix The Epoxy Resin And Hardener
Mixing epoxy resin and hardener is a vital step in creating epoxy floor designs. Here is a detailed guide on how to properly mix the epoxy resin and hardener:
- Collect all the necessary materials: epoxy resin, hardener, measuring containers, and stir sticks.
- Refer to the instructions on the packaging of the epoxy resin and hardener to determine the correct mixing ratio.
- Measure the appropriate amount of epoxy resin and hardener according to the specified ratio.
- Pour the measured epoxy resin into a clean mixing container.
- Add the measured hardener to the resin in the mixing container.
- Using a stir stick, thoroughly mix the resin and hardener together for the recommended duration.
- Ensure complete mixing by scraping the sides and bottom of the container.
- Avoid creating bubbles while stirring by using slow and deliberate movements.
Following these steps will guarantee a well-blended epoxy resin and hardener, which is crucial for achieving a successful epoxy floor design.
2. Add Pigment Or Dye
To add pigment or dye to your epoxy floor design, follow these steps:
- Mix the epoxy resin and hardener according to the manufacturer’s instructions.
- Once the mixture is ready, add the pigment or dye of your choice. This step is optional and can be used to customize the color of your floor.
- Stir the mixture thoroughly until the pigment or dye is evenly distributed.
- Apply the base coat of the epoxy mixture onto the prepared floor surface.
- Continue with the remaining steps of the epoxy floor design process, such as applying the design and top coat.
By adding pigment or dye, you can create a vibrant and unique look for your epoxy floor design.
3. Apply Base Coat
Applying the base coat is a crucial step in creating an epoxy floor design. Follow these steps to ensure a successful application:
- Clean and prepare the floor by removing any debris or dust.
- Repair any cracks or imperfections in the floor using epoxy filler.
- Apply a primer to ensure proper adhesion of the base coat.
- Mix the epoxy resin and hardener according to the manufacturer’s instructions.
- Apply the base coat evenly using a roller or brush, working in small sections.
- Allow the base coat to dry completely before moving on to the next step.
By applying the base coat properly, you create a solid foundation for the design and ensure a long-lasting and visually appealing epoxy floor.
4. Apply Design
To apply a design on an epoxy floor, follow these steps:
- Prepare the epoxy mixture according to the manufacturer’s instructions.
- Using techniques such as marbling, swirling, or stenciling, apply the desired design to the floor.
- Work quickly to ensure the epoxy doesn’t start to harden before the design is complete.
- Use tools like brushes, sponges, or rollers to create the desired effect.
- Allow the design to cure for the recommended time before applying the top coat.
5. Apply Top Coat
Applying a top coat is an essential step in the epoxy floor design process. This protective layer adds durability and enhances the appearance of the floor. Here are the steps to apply the top coat:
- Mix the top coat of epoxy resin and hardener according to the manufacturer’s instructions.
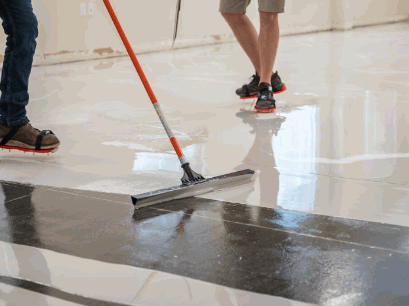
- Pour the mixture onto the floor and spread it evenly using a roller or squeegee.
- Work in small sections to ensure thorough coverage.
- Use a brush or roller to eliminate any air bubbles or streaks.
- Allow the top coat to cure as recommended by the manufacturer.
By following these steps, you can achieve a smooth and long-lasting finish for your epoxy floor design.
How To Maintain Epoxy Floor Design?
Now that you have created a beautiful and durable epoxy floor design, it’s important to know how to maintain it. In this section, we’ll discuss some simple yet effective ways to keep your epoxy floor in top condition. From regular cleaning to avoiding harsh chemicals, we’ll cover all the essential steps to prolong the lifespan of your epoxy floor. So, let’s dive into the tips for maintaining your epoxy floor design and ensuring it stays as good as new.
1. Regular Cleaning
Regular cleaning is essential for maintaining the longevity and appearance of an epoxy floor design. Here are the steps to regular cleaning:
- Sweep or vacuum the floor to remove loose dirt and debris.
- Mix a mild detergent with warm water.
- Use a mop or soft-bristle brush to scrub the floor gently.
- Rinse the floor thoroughly with clean water.
- Dry the floor with a clean mop or towel to prevent water spots.
2. Avoid Harsh Chemicals
To maintain the longevity and appearance of your epoxy floor design, it is crucial to avoid using harsh chemicals. Here are some steps to follow:
- Use mild cleaning solutions: Opt for gentle cleaners specifically formulated for epoxy floors.
- Avoid acidic or abrasive cleaners: Harsh chemicals like bleach, ammonia, or vinegar can damage the epoxy surface, causing it to dull or discolor.
- Wipe up spills promptly: Accidental spills of chemicals or solvents should be cleaned immediately to prevent them from penetrating the epoxy coating.
- Protect the floor during maintenance: When performing maintenance tasks such as painting or applying sealants, use drop cloths or protective mats to prevent contact with harsh chemicals.
By following these steps, you can ensure that your epoxy floor design stays in top condition for years to come while avoiding any damage from harsh chemicals.
3. Use Protective Mats For High Traffic Areas
Using protective mats is essential in high-traffic areas to preserve the quality and longevity of epoxy floor designs. Here are the steps to follow when using protective mats:
- Measure the area: Determine the size and shape of the high-traffic area where the protective mat will be placed.
- Choose the right mat: Select a mat that is durable, non-slip, and resistant to wear and tear.
- Clean the floor: Before placing the mat, make sure the floor is clean and free from debris, dust, and moisture.
- Position the mat: Carefully place the mat in the desired location, ensuring it covers the entire high-traffic area.
- Secure the mat: Use adhesive or double-sided tape to secure the mat in place, preventing it from shifting or moving.
- Maintain the mat: Regularly clean and inspect the mat for any signs of damage or wear, replacing it if necessary.